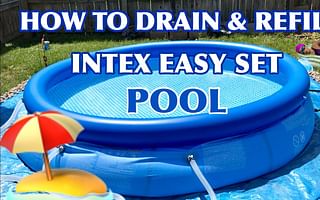
How to Repair Your Inflatable Pool: A Step by Step Guide

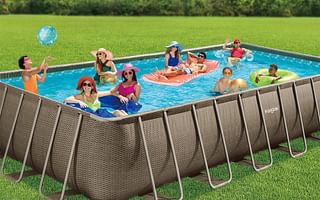
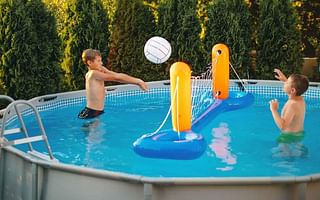
Summer's playgrounds often involve sunny days, sparkling water, and the delightful presence of your inflatable pool.
But as with any cherished possession, wear and tear can appear, leaving you to repair your inflatable pool.
Don't fret – this step-by-step guide is your companion in restoring your aquatic haven to its former glory.
In this guide, we're delving into the world of pool repair, from identifying leaks to patching and sealing.
The key to salvaging your pool lies within these instructions, whether a small puncture or a minor tear.
So, grab your patch kit, gather your supplies, and embark on a journey to master repairing your inflatable pool.

Before you can dive into fixing your inflatable pool, the first step is to identify the source of the problem. In this case, we're talking about a leak. But how do you find a leak in something as vast as an inflatable pool? Don't worry; I've covered you with practical inflatable pool leak solutions.
Start by inflating your pool to its total capacity. This will help to expose the leak. Now, listen closely. A hissing sound is often a telltale sign of a leak. If you can't hear anything, don't fret. There's another method you can use - the soapy water technique. Mix some dish soap with water in a spray bottle over the pool surface. The soap will bubble up at the site of the leak, making it easy to spot.
Another way to find a leak is by visually inspecting the pool. Look for areas where the pool surface is punctured, torn, or appears to be thinner. These are likely spots for leaks. Remember, the leak could be anywhere - on the bottom, sides, or even the top rim of the pool. So, make sure you check every inch.
Once you've found the leak, mark it with a waterproof marker. This will help you locate it quickly when it's time for the DIY inflatable pool repair. Now that you've successfully identified the leak, you're ready to move on to the next step in this step-by-step inflatable pool repair guide: Gathering the Necessary Tools.
Now that you've located the leak, it's time to gather the necessary tools for your DIY inflatable pool repair. Having the right tools will make the process smoother and more efficient. So, what will you need?
1. Inflatable Pool Patch Kit: This is the show's star. An inflatable pool patch kit usually includes adhesive and patches. These kits are designed to fix inflatable pool leaks, so they're your best bet. If you don't have a patch kit, you can use a piece of heavy-duty plastic and waterproof adhesive as an alternative.
2. Scissors: You'll need a pair of sharp scissors to cut out the patch. Ensure the patch is larger than the leak to ensure a secure seal.
3. Waterproof Marker: If you haven't marked the leak during identification, you'll need a waterproof marker. This will help you locate the leak quickly during the repair process.
4. Clean Cloth: Clean the area around the leak before applying the patch. A clean, dry cloth will do the job.
5. Rubber Gloves: To protect your hands from the adhesive, wearing rubber gloves during patching is a good idea.
With these tools, you're well-equipped to repair your inflatable pool. Remember, preparation is critical in this DIY inflatable pool patch process. So, gather your tools, roll up your sleeves, and move on to the next step: Preparing the Pool for Repair.

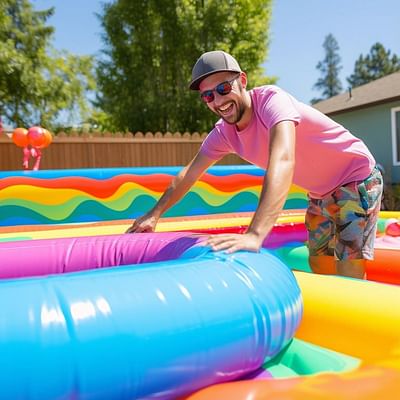
Now that you've assembled your toolkit, it's time to prepare your inflatable pool for the repair process. This step is crucial to ensure the adhesive and patch adhere correctly to the pool's surface. Let's dive into the process of preparing your collection for repair.
Step 1: Deflate the Pool
First, you'll need to deflate your pool. This makes it easier to apply the patch and ensures a tighter seal. Open the valve and let the air out. Remember, you don't need to deflate the pool completely; just enough to make the area around the leak flat and easily accessible.
Step 2: Clean the Area
Next, use your clean cloth to wipe the area around the leak. This removes any dirt or debris that could interfere with the adhesive. Ensure the place is dry before moving on to the next step.
Step 3: Mark the Leak
If you haven't already done so, use your waterproof marker to mark the area around the leak. This will help you locate it quickly when ready to apply the patch.
Step 4: Cut the Patch
While waiting for the cleaned area to dry, cut out your patch. Remember, it should be larger than the leak to ensure a secure seal. A good rule of thumb is to cut the patch about an inch more significantly than the leak on all sides.
With these steps, you've successfully prepared your inflatable pool for repair. It's time to move on to the exciting part: applying the patch. Patience and precision are essential in this DIY inflatable pool repair process. So, take your time, follow the steps carefully, and you'll have your pool ready for fun.
Now that your inflatable pool is primed and ready for repair, it's time to apply the patch. This is a critical stage in your DIY inflatable pool repair journey, and it's essential to execute it precisely. Here's your step-by-step inflatable pool repair guide to patching that pesky leak.
Step 1: Apply the Adhesive
Begin by applying a generous amount of adhesive to the patch. Make sure to cover the entire patch surface, extending to the edges. This ensures a secure bond between the patch and the pool surface.
Step 2: Position the Patch
Next, carefully place the patch over the marked leak area. Remember, the adhesive side should be facing down. Smooth the patch from the center towards the edges to eliminate air bubbles. This step is crucial for creating a watertight seal.
Step 3: Apply Pressure
Once the patch is in place, apply pressure to it. You can use a small roller or even the back of a spoon for this. The goal is to ensure the patch fully adheres to the pool surface, creating a solid bond.
Step 4: Let it Dry
Now, the most challenging part - waiting. Allow the patch to dry completely. Depending on the adhesive used, this can take anywhere from a few hours to overnight. Please resist the temptation to inflate or wet the pool during this time. Patience is key here.
And there you have it - you've successfully applied the patch to your inflatable pool. But we're not done yet. The next step is to ensure a secure seal, which we'll cover in the following section. Remember, fixing an inflatable pool is a process, but with this inflatable pool patching guide, you're well on your way to getting back to your aquatic fitness routine.

Ensuring a secure seal is the next crucial step in your DIY inflatable pool repair journey. This step is about double-checking your work and providing the patch is firmly attached to the pool surface. It's the difference between a temporary fix and a long-lasting repair. So, let's dive right into it.
Step 1: Check the Edges
Start by examining the edges of the patch. They should be fully adhered to the pool surface, with no visible air bubbles or loose ends. If you notice any issues, apply more adhesive and smooth it out. Remember, the goal is a watertight seal, so don't skip this step.
Step 2: Inspect the Surface
Next, inspect the surface of the patch. It should be smooth and flat, without any wrinkles or bubbles. If you notice any, use your roller or spoon to smooth them out. This not only ensures a secure seal but also helps prevent future leaks.
Step 3: Apply a Sealant
Consider applying a sealant over the patch for an extra layer of protection. This can be a clear, waterproof sealant designed for inflatable pools. It adds a layer of security, ensuring your patch stays put and your collection remains leak-free.
And there you have it! By following these steps, you're ensuring a secure seal for your inflatable pool patch. Patience and attention to detail are critical to a successful DIY inflatable pool repair. With this guide, you're well-equipped to tackle any inflatable pool leak solutions that come your way. Next, we'll test the repair to ensure your pool is read some aquatic fitness fun.
Now that you've secured your patch, it's time to move on to the next phase of your DIY inflatable pool repair: Testing the Repair. This step is crucial as it ensures your hard work has paid off and your pool is ready for splashy fun. Let's get started.
Step 1: Fill the Pool
Begin by filling your inflatable pool with a small amount of water. You don't need to fill it to the brim, just enough to cover the repaired area. This will help you identify if the patch is holding up or if there are any signs of leakage.
Step 2: Check for Bubbles
Next, keep a close eye on the patched area. Look for any bubbles or signs of air escaping from the patch. If you see bubbles, it's a sign that air is running, and the patch may not have been adequately sealed.
Step 3: Apply Pressure
Now, apply some pressure to the patched area. You can do this by gently pressing down with your hand. If the patch holds firm and doesn't bulge or leak, congratulations! You've completed your DIY inflatable pool repair. You may need to revisit the patching process if it swells or leaks.
Step 4: Dry and Inspect
Finally, empty the pool and let the patch dry completely. Once dry, give it a final inspection. It should be as smooth and firm as the rest of the collection. If it is, your group is ready for aquatic fitness fun!
By following this step-by-step inflatable pool repair guide, you're not just fixing an inflatable pool; you're ensuring many more days of poolside enjoyment. Patience, attention to detail, and thorough testing are critical to a successful repair. Happy swimming!

Now that we've walked through the process of repairing your inflatable pool, let's switch gears and focus on some preventive maintenance tips. These strategies will help you avoid the need for future repairs, ensuring your inflatable pool stays in top-notch condition for all your aquatic fitness sessions.
Regular Inspection: Like any fitness equipment, your inflatable pool requires regular check-ups. Make it a habit to inspect your pool for any signs of wear and tear, such as small punctures or weak spots. Early detection can save you from a more significant repair job.
Proper Inflation: Over-inflating your pool can put undue stress on the material, leading to potential leaks. Always follow the manufacturer's instructions when inflating your pool to ensure it's not too tight or loose.
Cleanliness: Keeping your pool clean is not just about water hygiene. It's also about preventing debris from causing damage. Regularly remove leaves, twigs, or other objects that could puncture your pool.
Proper Storage: When not in use, store your inflatable pool in a cool, dry place away from direct sunlight. Sunlight can cause the material to degrade over time, while moisture can lead to mold and mildew. Also, ensure the pool is fully deflated and folded carefully to avoid creases that can become weak spots.
By incorporating these preventive maintenance tips into your routine, you're extending the lifespan of your inflatable pool and ensuring it remains a safe and enjoyable space for your aquatic workouts. Remember, a well-maintained pool is a happy pool!

And there you have it, pool enthusiasts and repair heroes.
A comprehensive guide to repairing your inflatable pool and extending the life of your cherished summer sanctuary.
Remember, it's not just about the repairs; it's about the care and commitment you invest in your pool's longevity.
Whether you master patching or uncover hidden leaks, each repair contributes to your pool's magic continuity.
So, as you prepare for sun-soaked days and cannonball splashes, let your determination to repair be your guide.
In the words of summer sage John Lubbock, "Rest is not idleness, and to lie sometimes on the grass on a summer day listening to the murmur of water, or watching the clouds float across the sky, is hardly a waste of time."
With every patch and every seal, you're ensuring your pool remains a canvas for summer's memories and delights.
So, repair, restore, and savor the joyful moments your skillful repairs will bring, offering an oasis of happiness in every splash!

Derek Fisher is a fitness trainer who advocates for aquatic exercises as a fun and effective way to stay in shape. He often uses inflatable pools for his training sessions, and he has a wealth of knowledge about the best pool options for different fitness levels. Derek's articles are a great resource for anyone looking to add a splash of fitness to their pool time.
All Rights Reserved © 2025


Post a comment